HOW TO CAN – WATER BATH AND PRESSURE CANNING
How to Can
First off you should read your manual for your Pressure Canner.. but here is the gist of it.
FIRST OFF… you need to know the difference between a Pressure Canner, A Pressure Cooker, and Water Bath Canning!!!
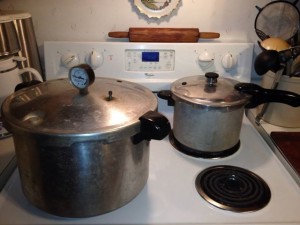
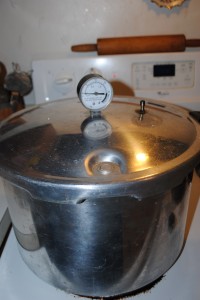
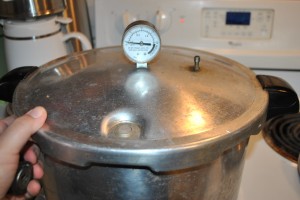
below you see my Pressure Canner .. it is the large one.. the smaller one is my pressure cooker.. I have several pressure cookers, some much larger…
The pressure canner you can also use to water bath.. just simply do not use the lid.. The lid serves to create a seal, where you will cook your food under pressure, it works the same way in the pressure cooker…
I recommend you spend the little bit extra and get the full size large canner that will hold up to 7 quarts at once.
 Filling and Sealing Jars
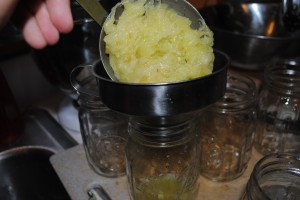
Ladle prepared food through a wide-mouth funnel into clean, hot canning jars.
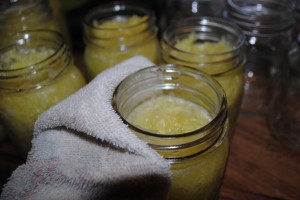
Leave headspace as indicated in recipe. Wipe jar rims clean,
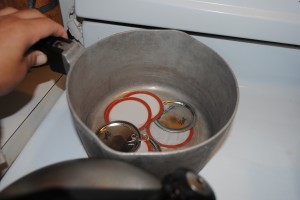
Make sure you put lids in hot water for a few minutes to loosen the wax on rings to ensure sealing.. (many people skip this process but it is recommended)
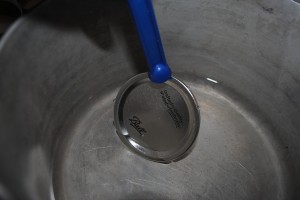
use the little magnetic wand to get your rings out easily
make sure no air bubbles in can… if there is simply take case knife and run around inside of jar… then..
place lids on jars with sealing compound next to the glass, and screw the ring bands on firmly, but not too tightly so they can expand during the process
– at this point you should know if your doing water bath method or pressure canning.. see below the difference in the two….
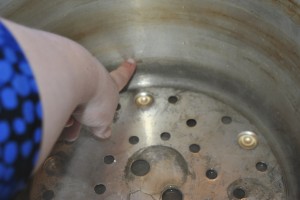
When Pressure canning, your water levels are VERY important.. inside your canner there will be a mark/ groove etched out near the bottom of the canner showing you where your water should be.. sometimes you have to feel for it cause it can be hard to see, so I just take a black permanent marker and mark over my groove so I can see it good without feeling for it..
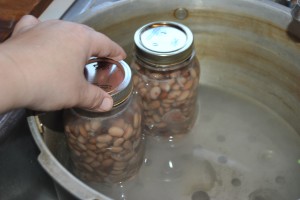
always put your water in before your jars when pressure cooking so you get the right amount of water to the line
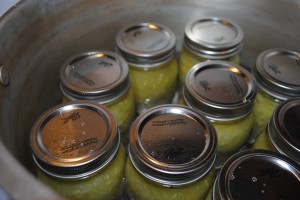
Now put into canner.
Hot Water Bath Method
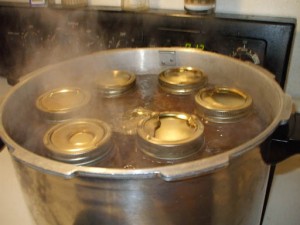
Place filled jars on a rack in a water bath canner or deep, covered kettle filled with hot, but not boiling, water. Arrange jars on the rack so they do not touch each other or the sides of the canner. Add hot water as needed to cover the jar tops with an inch or two of water. Bring the water to a boil, and boil with the canner covered for 10 minutes or the time given in recipe. Start counting the processing time when the water reaches the boil. At altitudes about 3,000 feet, add 2 minutes’ processing time for each additional 1,000 feet. Remove jars with a jar lifter and cool on a folded towel or rack in a draft-free place. Leave pace between the jar for air to circulate.
PLEASE NOTE: According to the USDA, ALL jams, jellies and preserves should be processed in a water bath for 10 minutes – NO LESS!
Test for a Seal
To test the seal, press down the center of each lid with your finger. Lid that are sealed will stay down.
As an alternative to boiling canning jars to sterilize them, place the clean jars in a cold oven, set temperature to 250 degrees F, and leave them for 30 minutes.
Testing Jell Point
The first method is to take the temperature of boiling water, then cook the jelly mixture to a temperature 8 degrees F higher than your boiling point. The temperature to reach at sea level is 220 degrees F. At this point, enough liquid has evaporated from the juice mixture to concentrate the sugar, acid pectin and transform it into jelly.
The second method is to dip a cool metal spoon into the boiling liquid. Lift the spoon out and tip it so that the jelly runs off the side of the spoon. When the jelly falls in two drops and then flows together to form a sheet, it is ready.Another test is to put a spoonful of jelly onto a cold plate and place it in the freezer for a few minutes. The mixture will set if the jell point has been reached. Remember to remove the kettle from the heat while you perform this test.
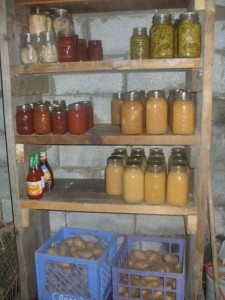
STORE canned items in a COOL DARK place preferably a basement…
Now if your PRESSURE CANNING…
it is best you use a canner with a DIAL.. if your saying dial thingy? . the DIAL thingy LOL is what you watch … OK FIRST you put water in the canner up to the mark (there should be a notch showing the water mark)
THEN you load your canner THEn you put on lid, locking into place by lining up the arrows… and turn on stove eye starting out on high for now…..
you will WAIT until you get a steady steam of pressure coming OUT of the valve
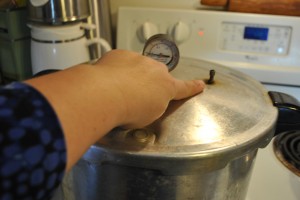
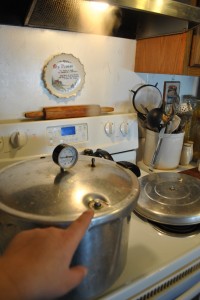
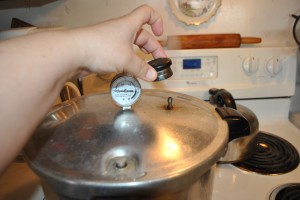
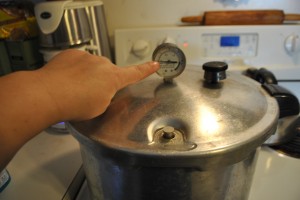
wait, we are waiting for pressure to build.. .. let the steam come out for a little bit to make sure the valve is free and clear, before you rush put your weight on…. you can see in the picture below the steam is coming out heavily and my pressure has built up..see my pressure valve I am pointing too ?
Now I can put my weight on or Petcock as I always heard it called LOL
NOW very import and!!! you watch as your pressure climbs on the pressure gauge… most recipes call for TEN LBS of PRESSURE for like say 25 minutes if your doing green beans… you wait till it builds up and when it starts getting close to the ten you start slowly adjusting your stove heat turning it down.. so that when it gets to 10 it STOPS building.. (THAT is where you can get into BLOWING UP lids hhahahha cause you don’t want it to keep building)
once it is at ten or your desired pressure.. try and KEEP it regulated do not I repeat DO NOT go away and forget it.. once you pressure can you are COMMITTED to stay in that area until done… now when you adjust your heat though, you can not change your temperature drastically very fast… must be gradual, do not turn it from way high to way low real fast or you will run the risk of busting jars, or pulling all your liquid out of your jars..
Simply just regulate your temp and watch it, don’t let it go over… and slowly turn down heat as you go until done.. now when time is up, turn OFF heat totally and don’t touch the weight let the pressure go down on its own or the jars could crack with SUDDEN temp changes.. it is really very easy you just have to watch..the hardest part of canning is preparing your food to be canned in my opinion..
HAPPY CANNING>. this was just the jist of it.. if you need more info… please feel free to ask
Categories
- ***SERENA'S FAVORITES (848)
- *POETRY BY SERENA* (14)
- *TRIED AND TRUE RECIPES-FACEBOOK GROUP FOOD DISCUSSIONS WORTH KEEPING LOL (105)
- *VIDEOS (12)
- AISIAN STYLE/CHINESE/ JAPANESE/ KOREAN/THAI (50)
- AMISH & MENNONITE RECIPES (64)
- ANTIQUE RECIPES (338)
- ANYTHING ITALIAN/PASTA DISHES ECT (211)
- APPETIZERS/SNACKS/DIPS (343)
- BABY FOODS/IDEAS (1)
- BBQ (72)
- BEEF (245)
- BEVERAGES/NON ALCOHOLIC PLEASE (65)
- BIRTHDAY IDEAS (50)
- BLENDER/FOOD PROCESSOR RECIPES (5)
- BORROWED RECIPES FROM THE WEB (103)
- BRAZILLIAN (1)
- BREADS/PASTRIES (339)
- BREAKFAST/BRUNCH (222)
- BROWNIES (80)
- BUTTER (8)
- CAKE ICINGS /FROSTING/ FILLINGS (159)
- CAKE MIX RECIPES (155)
- CAKES (586)
- CAMPFIRE COOKING/OUTDOOR (18)
- CANDY/FUDGE/ POPCORN BALLS (249)
- CANNING/PRESERVING/TIPS (234)
- CASSEROLES (205)
- CAST IRON COOKING (102)
- CHEESE (78)
- CHEESECAKES (87)
- CHICKEN/TURKEY * POULTRY* (358)
- CHRISTMAS (348)
- COBBLERS/DESSERTS/ PUDDINGS (271)
- COOKIES/BARS (359)
- COOKING FOR LARGE GROUPS (50)
- CORNBREAD (50)
- CRAFT IDEAS AND PHOTOS (64)
- CREATIONS (174)
- CROCK-POT/SLOW COOKER (161)
- CUPCAKES (76)
- CURRIES (1)
- DAIRY FREE (8)
- DECORATING FOOD TIPS (26)
- DIABETIC/SUGAR FREE (27)
- DRIED MEATS, FRUITS, HERBS- & Recipes using dried foods (25)
- DUMPLING RECIPES (32)
- EASTER (83)
- EGG RECIPES (61)
- EGGLESS RECIPES (4)
- FALL/HALLOWEEN (124)
- FAVORITE KITCHEN EQUIPMENT/ ACCESSORIES (18)
- FISH/SEAFOOD ECT… (109)
- FLOPS/ & CREATIVE USES (2)
- FOOD ALLERGIES? (3)
- FOOD ART (7)
- FREEZING FOODS (60)
- FRIED FOODS (99)
- FRUIT RECIPES (175)
- GARDENING TIPS AND PHOTOS HERE (61)
- GERMAN (14)
- GLUTEN FREE (20)
- GOAT (1)
- GRAVIES/SAUCES (12)
- GRILLING OUT/PICNIC FOOD IDEAS (78)
- HITS (56)
- HOUSEHOLD RECIPES/ HOME REMEDIES (94)
- HOW TO…. (92)
- HUNGARIAN RECIPES (2)
- I LEARNED THE HARD WAY NOT TO….. (20)
- ICE CREAM MACHINE RECIPES (4)
- ICE CREAM/SHERBERTS & TOPPINGS (60)
- INDIAN CUISINE (5)
- INTERNATIONAL (47)
- IRISH (8)
- JAMAICAN (3)
- JUICING/SMOOTHIES (11)
- KIDS RECIPES (215)
- LAMB/MUTTON (9)
- LEFTOVERS (63)
- LIVER RECIPES (4)
- LOW CARB (30)
- LOW CHOLESTEROL (15)
- LOW FAT/DIET (183)
- MALAYSIAN/NYONA (4)
- MEASUREMENT CHARTS (4)
- MEXICAN/SOUTH OF THE BORDER (143)
- MICROWAVE COOKING (30)
- MISCELLANEOUS (37)
- MOM ON THE GO (120)
- MONGOLIAN (2)
- MUFFINS (57)
- MUST HAVES FOR THE PANTRY/STAPLES (1)
- NAVAJO/AMERICAN INDIAN (4)
- NO BAKE RECIPES (39)
- ORGANIC COOKING (17)
- PARTY PLEASERS/SHOWERS ECT… (139)
- PASTA DOUGH RECIPES (8)
- PEANUT BUTTER/NUTELLA (72)
- PERUVIAN (4)
- PESTO (5)
- PET RECIPES/ TIPS (8)
- PHILIPPINE DISHES (2)
- PICTURES YOU WANT TO SHARE (172)
- PIES/TARTS (298)
- PIZZA (87)
- POLISH (1)
- PORK (168)
- POTATOES (181)
- PRESSURE COOKER (31)
- PUFF PASTRY /PHYLLO DOUGH RECIPES (16)
- RAMP RECIPES (2)
- RANDOM BLOGGING (39)
- RECIPES IN A JAR/GIFT GIVING IDEAS (19)
- RECIPES TO LIVE BY (14)
- RESTAURANT RECIPES (82)
- RICE RECIPES (99)
- ROASTER IDEAS (1)
- SALAD DRESSINGS (11)
- SALADS/GREENS (69)
- SANDWICHES/BURGERS/SPREADS (78)
- SAUSAGE/KIELBASA RECIPES (23)
- SCHOOL STUFF (8)
- SCRATCH MIXES /CANNED GOODS (34)
- SEASONINGS/SPICES/RUBS (17)
- SEMI HOMEMADE/TRICKS/QUICK N EASY (192)
- SIDES/VEGGIES (243)
- SMOKER (3)
- SOUFFLE'S (4)
- SOUL FOOD/CREOLE (46)
- SOUPS/CHILIES & BEANS /CHOWDERS (263)
- SPANISH (3)
- ST. PATTY'S DAY (31)
- STUFFING/DRESSINGS/STUFFED FOODS (38)
- SUBSTITUTIONS (44)
- SUNDAY SCHOOL CRAFTS IDEAS AND FOOD (103)
- THANKSGIVING FAVORITES (131)
- TIPS FOR THE COOK (107)
- Uncategorized (2)
- VALENTINE IDEAS RECIPES /ROMANTIC/ RECIPES FOR 2 (53)
- VEGETARIAN/VEGAN (87)
- WAITING TO BE MADE (REMINDER) (74)
- WEDDING IDEAS (3)
- WILD GAME & WV TRADITIONS (147)
- ZUCCHINI & YELLOW SQUASH RECIPES (72)


